Step 1
Download Visual Studio Community 2013 and install it onto your computer, if it’s already downloaded and installed select Launch to start Visual Studio Community 2013 or if it has already been downloaded and installed then start the application.

Step 2
Once Visual Studio Community 2013 has started select File, then New, then Project… from the Menu.

Step 3
From the New Project window select Visual C# then Store Apps from Installed Templates then select Blank App (Universal Apps) from the list, then type in a Name and select a Location to save to before selecting Ok to create the Project.

Step 4
Once the Project is created from the Solution Explorer select the Project ending with .Shared

Step 5
Once done select from the Menu, Project, then Add New Item…

Step 6
From the Add New Item window select Visual C# from Installed then select Code File from the list, then type in the Name as Shared.cs before selecting Add to add the file to the Project

Step 7
Once in the Code View for Shared.cs the following should be entered:
using System;
using System.Collections.Generic;
using System.Threading.Tasks;
using Windows.ApplicationModel.Activation;
using Windows.Storage;
using Windows.Storage.Pickers;
using Windows.Storage.Provider;
using Windows.UI.Popups;
using Windows.UI.Xaml.Controls;

public class Shared
{
    public delegate void OpenedEvent(string value);
    public static event OpenedEvent Opened;

    private static string data = string.Empty;

    public async Task<bool> Confirm(string content, string title, string ok, string cancel)
    {
        bool result = false;
        MessageDialog dialog = new MessageDialog(content, title);
        dialog.Commands.Add(new UICommand(ok, new UICommandInvokedHandler((cmd) => result = true)));
        dialog.Commands.Add(new UICommand(cancel, new UICommandInvokedHandler((cmd) => result = false)));
        await dialog.ShowAsync();
        return result;
    }

    public async void New(TextBox display)
    {
        if (await Confirm("Create New Document?", "Text Editor", "Yes", "No"))
        {
            display.Text = string.Empty;
        }
    }

    private static async void read(StorageFile file)
    {
        try
        {
            if (file != null)
            {
                if (Opened != null)
                {
                    Opened(await FileIO.ReadTextAsync(file));
                }
            }
        }
        catch
        {

        }
    }

    private static async void write(StorageFile file, string value)
    {
        try
        {
            if (file != null)
            {
                CachedFileManager.DeferUpdates(file);
                await FileIO.WriteTextAsync(file, value);
                FileUpdateStatus status = await CachedFileManager.CompleteUpdatesAsync(file);
            }
        }
        catch
        {

        }
    }

    public async void Open()
    {
        try
        {
            FileOpenPicker picker = new FileOpenPicker();
            picker.SuggestedStartLocation = PickerLocationId.DocumentsLibrary;
            picker.FileTypeFilter.Add(".txt");
#if WINDOWS_PHONE_APP
            picker.PickSingleFileAndContinue();
            await Task.Delay(0);
#else
            read(await picker.PickSingleFileAsync());
#endif
        }
        catch
        {

        }
    }

    public async void Save(string value)
    {
        try
        {
            FileSavePicker picker = new FileSavePicker();
            picker.SuggestedStartLocation = PickerLocationId.DocumentsLibrary;
            picker.FileTypeChoices.Add("Plain Text", new List<string>() { ".txt" });
            picker.DefaultFileExtension = ".txt";
            picker.SuggestedFileName = "Document";
#if WINDOWS_PHONE_APP
            data = value;
            picker.PickSaveFileAndContinue();
            await Task.Delay(0);
#else
            write(await picker.PickSaveFileAsync(), value);
#endif
        }
        catch
        {

        }
    }

#if WINDOWS_PHONE_APP
    public static void Continue(IContinuationActivatedEventArgs args)
    {
        if (args != null)
        {
            switch (args.Kind)
            {
                case ActivationKind.PickFileContinuation:
                    read((args as FileOpenPickerContinuationEventArgs).Files[0]);
                    break;
                case ActivationKind.PickSaveFileContinuation:
                    write((args as FileSavePickerContinuationEventArgs).File, data);
                    break;
            }
        }
    }
#endif
}
It should then appear as such:

Step 8
From the Solution Explorer select the MainPage.xaml from the Project ending with .Windows

Step 9
Select from the Menu, View then Designer

Step 10
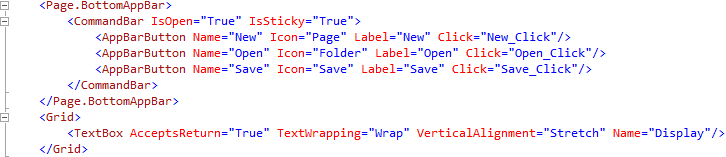
The Design View will be displayed along with the XAML View and in this above <Grid Background=”{ThemeResource ApplicationPageBackgroundThemeBrush}”> enter the following XAML:
<Page.BottomAppBar>
	<CommandBar IsOpen="True" IsSticky="True">
		<AppBarButton Name="New" Icon="Page" Label="New" Click="New_Click"/>
		<AppBarButton Name="Open" Icon="Folder" Label="Open" Click="Open_Click"/>
		<AppBarButton Name="Save" Icon="Save" Label="Save" Click="Save_Click"/>
	</CommandBar>
</Page.BottomAppBar>
While still in the XAML View below <Grid Background=”{ThemeResource ApplicationPageBackgroundThemeBrush}”>enter the following XAML:
<TextBox AcceptsReturn="True" TextWrapping="Wrap" VerticalAlignment="Stretch" Name="Display"/>
It should appear as such:

Step 11
Select from the Menu, View then Code

Step 12
Once in the Code View below the public MainPage() { … } the following should be entered:
public Shared Shared = new Shared();

private void New_Click(object sender, RoutedEventArgs e)
{
	Shared.New(Display);
}

private void Open_Click(object sender, RoutedEventArgs e)
{
	Shared.Opened += (string value) =>
	{
		Display.Text = value;
	};
	Shared.Open();
}

private void Save_Click(object sender, RoutedEventArgs e)
{
	Shared.Save(Display.Text);
}
It should then appear as such:

Step 13
That completes the Windows Application part so Save the Project then select the Debug and Simulator option to run the Application

Step 14
Once the Simulator has started the Application should then appear

Step 15
After it has started running you can then type in any text then you can Save the document to Open later or start a New document

Step 16
To Exit the application select Stop Debugging in Visual Studio Community 2013

Step 17
Another part is the Windows Phone application so from the Solution Explorer select the MainPage.xaml from the Project ending with .WindowsPhone

Step 18
Select from the Menu, Project then Set as StartUp Project

Step 19
Select from the Menu, View then Designer
Step 20
The Design View will be displayed along with the XAML View and in this above <Grid> enter the following XAML:
<Page.BottomAppBar>
	<CommandBar IsOpen="True" IsSticky="True">
		<AppBarButton Name="New" Icon="Page" Label="New" Click="New_Click"/>
		<AppBarButton Name="Open" Icon="Folder" Label="Open" Click="Open_Click"/>
		<AppBarButton Name="Save" Icon="Save" Label="Save" Click="Save_Click"/>
	</CommandBar>
</Page.BottomAppBar>
While still in the XAML View below <Grid>enter the following XAML:
<TextBox AcceptsReturn="True" TextWrapping="Wrap" VerticalAlignment="Stretch" Name="Display"/>
It should appear as such:
Step 21
Select from the Menu, View then Code
Step 22
Once in the Code View below the protected override void OnNavigatedTo(NavigationEventArgs e) { … } the following should be entered:
public Shared Shared = new Shared();

private void New_Click(object sender, RoutedEventArgs e)
{
	Shared.New(Display);
}

private void Open_Click(object sender, RoutedEventArgs e)
{
	Shared.Opened += (string value) =>
	{
		Display.Text = value;
	};
	Shared.Open();
}

private void Save_Click(object sender, RoutedEventArgs e)
{
	Shared.Save(Display.Text);
}
It should then appear as such:
Step 23
From the Solution Explorer select the App.xaml from the Project ending with .Shared

Step 24
Select from the Menu, View then Code
Step 25
Once in the Code View below the public App() { … } the following should be entered:
#if WINDOWS_PHONE_APP
        protected override void OnActivated(IActivatedEventArgs e)
        {
            base.OnActivated(e);
            Shared.Continue(e as IContinuationActivatedEventArgs);
        }
#endif
It should then appear as such:

Step 26
That completes the Windows Phone Application part so Save the Project then select Debug and select Emulator 8.1 WVGA 4 inch 512MB option to run the Application

Step 27
Once the Emulator has started the Application should then appear

Step 28
After it has started running you can then type in any text then you can Save the document to Open later or start a New document

Step 29
To Exit the application select Stop Debugging in Visual Studio Community 2013


One thought on “Windows 8.1 and Windows Phone 8.1 Universal Application – Text Editor”