Media Player demonstrates how to use a MediaElement control to playback video
Step 1
If not already, follow Setup and Start on how to Install and get Started with Visual Studio 2017 or in Windows 10 choose Start, and then from the Start Menu find and select Visual Studio 2017.

Step 2
Once Visual Studio Community 2017 has started, from the Menu choose File, then New then Project…

Step 3
From New Project choose Visual C# from Installed, Templates then choose Blank App (Universal Windows) and then type in a Name and select a Location and then select Ok to create the Project

Step 4
Then in New Universal Windows Project you need to select the Target Version this should be at least the Windows 10 Fall Creators Update (10.0; Build 16299) and the Minimum Version to be the same.

The Target Version will control what features your application can use in Windows 10 so by picking the most recent version you’ll be able to take advantage of those features. To make sure you always have the most recent version, in Visual Studio 2017 select Tools Extensions and Updates… then and then see if there are any Updates
Step 5
Once done select from the Menu, Project, then Add New Item…

Step 6
From the Add New Item window select Visual C#, then Code from Installed then select Code File from the list, then type in the Name as Library.cs before selecting Add to add the file to the Project

Step 7
Once in the Code View for Library.cs the following should be entered:
using System;
using Windows.UI.Xaml;
using Windows.UI.Xaml.Controls;
using Windows.UI.Xaml.Input;

public class Library
{
    public delegate void PlayingEvent();
    public event PlayingEvent Playing;

    private DispatcherTimer _timer = new DispatcherTimer();

    public void Init()
    {
        _timer.Tick += (object sender, object e) =>
        {
            Playing?.Invoke();
        };
    }

    public void Timer(bool enabled)
    {
        if (enabled) _timer.Start(); else _timer.Stop();
    }

    public void Go(ref MediaElement display, string value, KeyRoutedEventArgs args)
    {
        if (args.Key == Windows.System.VirtualKey.Enter)
        {
            try
            {
                display.Source = new Uri(value, UriKind.Absolute);
                display.Play();
            }
            catch
            {

            }
        }
    }
}
In the Library.cs there are using statements to include the necessary functionality. There’s a PlayingEvent that will be used during playback and there’s an Init Method which is used to set up the DispatcherTimer used when in video playback. The Timer method is used to stop or start the DispatcherTimer. The Go Method handles when a URL of a video is typed in, the MediaElement will have its source set to a Url of a video typed in the TextBox.
Step 8
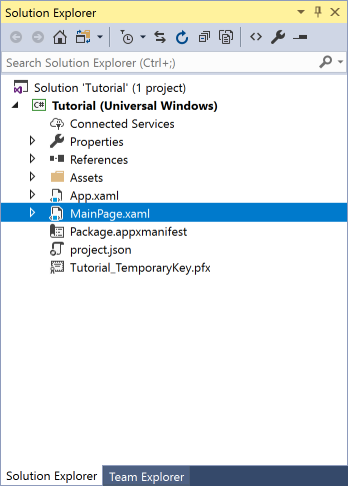
In the Solution Explorer select MainPage.xaml
Step 9
From the Menu choose View and then Designer

Step 10
The Design View will be displayed along with the XAML View and in this between the Grid and /Grid elements, enter the following XAML:
<Grid>
	<Grid.RowDefinitions>
		<RowDefinition Height="Auto"/>
		<RowDefinition Height="Auto"/>
		<RowDefinition Height="*"/>
	</Grid.RowDefinitions>
	<TextBox Grid.Row="0" Margin="20" Name="Value" InputScope="Url" KeyDown="Go_KeyDown"/>
	<Grid Grid.Row="1" Margin="5">
		<Grid.ColumnDefinitions>
			<ColumnDefinition Width="*"/>
			<ColumnDefinition Width="120"/>
		</Grid.ColumnDefinitions>
		<Slider Grid.Column="0" Padding="5" Minimum="0" Name="Position"/>
		<Slider Grid.Column="2" Padding="5" Minimum="0" Maximum="1" Value="0.5" StepFrequency="0.1" Name="Volume" ValueChanged="Volume_ValueChanged"/>
	</Grid>
	<MediaElement Grid.Row="2" Name="Display" AutoPlay="True" MediaOpened="Display_MediaOpened" MediaEnded="Display_MediaEnded" CurrentStateChanged="Display_CurrentStateChanged"/>
</Grid>
<CommandBar VerticalAlignment="Bottom">
	<AppBarButton Name="Play" Icon="Play" Label="Play" Click="Play_Click"/>
	<AppBarButton Icon="Stop" Label="Stop" Click="Stop_Click"/>
</CommandBar>
The first block of XAML the main user interface of the Application, this features a Grid with three rows, the first row is for the TextBox where the URL of a video may be entered, the second row is for a pair of Slider Controls for the Position in the Video and the other is for the Volumn of any sound in the video. The third row is for the MediaElement where a video can be displayed. The second block of XAML is is the CommandBar which contains the Play and Stop commands to perform the actions of the Video Player using the MediaElement control along with the Slider Controls.
Step 11
From the Menu choose View and then Code

Step 12
Once in the Code View, below the end of public MainPage() { … } the following Code should be entered:
Library library = new Library();

protected override void OnNavigatedTo(NavigationEventArgs e)
{
	library.Init();
	library.Playing += () =>
	{
		Position.Value = (int)Display.Position.TotalMilliseconds;
	};
}

private void Go_KeyDown(object sender, KeyRoutedEventArgs e)
{
	library.Go(ref Display, Value.Text, e);
}

private void Position_ValueChanged(object sender, RangeBaseValueChangedEventArgs e)
{
	if (Display != null && Position != null)
	{
		Display.Position = TimeSpan.FromMilliseconds(Position.Value);
	}
}

private void Volume_ValueChanged(object sender, RangeBaseValueChangedEventArgs e)
{
	if (Display != null && Volume != null)
	{
		Display.Volume = Volume.Value;
	}
}

private void Display_MediaOpened(object sender, RoutedEventArgs e)
{
	Position.Maximum = (int)Display.NaturalDuration.TimeSpan.TotalMilliseconds;
	Display.Play();
	Play.Icon = new SymbolIcon(Symbol.Pause);
	Play.Label = "Pause";
}

private void Display_MediaEnded(object sender, RoutedEventArgs e)
{
	Play.Icon = new SymbolIcon(Symbol.Play);
	Play.Label = "Play";
	Display.Stop();
	Position.Value = 0;
}

private void Display_CurrentStateChanged(object sender, RoutedEventArgs e)
{
	library.Timer(Display.CurrentState == MediaElementState.Playing);
}

private void Play_Click(object sender, RoutedEventArgs e)
{
	if (Display.CurrentState == MediaElementState.Playing)
	{
		Display.Pause();
		Play.Icon = new SymbolIcon(Symbol.Play);
		Play.Label = "Play";
	}
	else
	{
		Display.Play();
		Play.Icon = new SymbolIcon(Symbol.Pause);
		Play.Label = "Pause";
	}
}

private void Stop_Click(object sender, RoutedEventArgs e)
{
	Display.Stop();
}
Below the MainPage() Method an instance of the Library Class is created. The OnNavigatedTo is triggered when the MainPage is loaded and this will setup the MediaElement. The Go_KeyDown event is triggered when entering a Url in the TextBox, the Position_ValueChanged and Volume_ValueChanged allow the current position of the video to be displayed or changed and the volume of the video to be adjusted. The Display_MediaOpened and Display_MediaEnded handle Events from the MediaElement when a video playback has started or video playback has been completed. Display_CurrentStateChanged is used to update the state of the MediaElement and Play_Click and Stop_Click allow the video playback to be started or stopped.
Step 13
That completes the Universal Windows Platform Application so Save the Project then in Visual Studio select the Local Machine to run the Application

Step 14
After the Application has started running you can then type in the URL of any media item e.g. http://download.blender.org/peach/bigbuckbunny_movies/BigBuckBunny_320x180.mp4 then press or tap enter to load and Play the video and you can Pause or Stop the video playback

Step 15
To Exit the Application select the Close button in the top right of the Application
![]()

